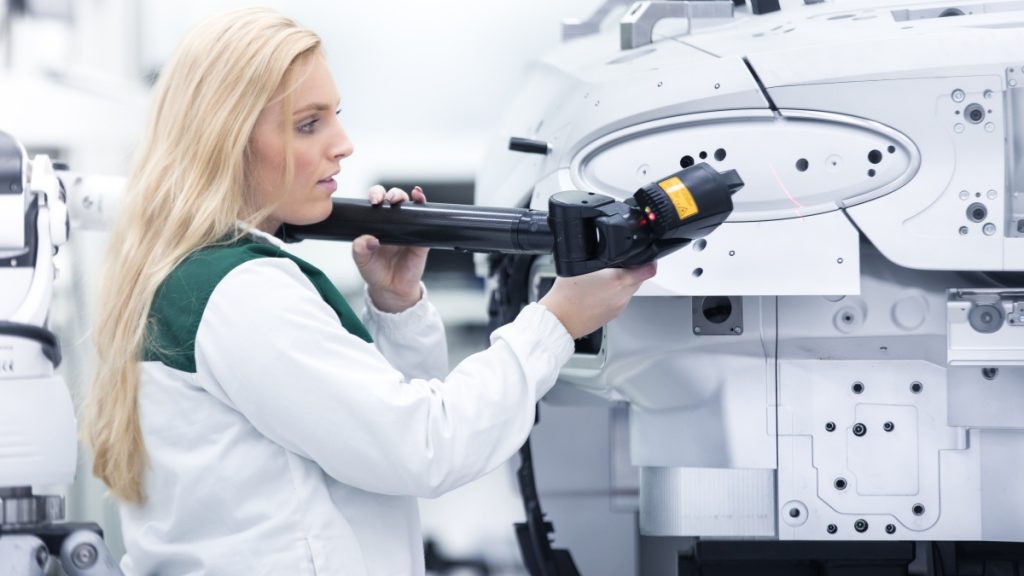
Deep in the heart of the Bentley factory in Crewe is a large, airy and air-conditioned workshop that visitors, even out of a government lockdown, will never see. It’s packed with the kind of precision instruments you’d expect to find in a space agency facility or university science lab. It’s here that Head of Metrology Michael Stockdale and his 25 colleagues measure every part of a Bentley to the highest standards of precision.
Metrology is the science of measurement, and it’s fundamental to the quality, performance and longevity of every Bentley that each component is made to consistently precise dimensions. Stockdale and his colleagues can measure every part of each model Bentley makes, from the smallest washer to body panels and interior trim, and ensure that no component strays from the close tolerances prescribed for it. “We have the tools to measure everything from the graining of leather to the surface of a cylinder bore, down to fractions of a micron” explains Stockdale.
Having measured components individually, they are measured again as sub-assemblies and once more as part of the finished vehicle. Thus, the Metrology team plays a vital role in ensuring that near perfection is repeatable.
The precise choreography of the Flying B
Measuring and enforcing the highest standards of dimensional accuracy is especially important for a vehicle, where multiple components become sub-assemblies. To take just one example, the retractable Flying B mascot that adorns the bonnet of the Flying Spur, which smoothly deploys and retracts only because each component in its complex control assembly is made to close and consistent dimensions. It is illuminated and linked to the keyless entry system as the driver approaches the car, yet it must also retract automatically in the event of an accident. To achieve this precise choreography and to ensure that it sits perfectly centred within its plinth, elements of the Flying B system have tolerances as low as 0.15 millimetres.
Tolerances finer than a single red blood cell
Laymen use ‘a hair’s breadth’ as a description of the tiniest imaginable measure, but such a term would be too imprecise for Bentley’s Metrology team. As Stockdale points out, a human hair can be anything from seventeen microns to over one hundred and fifty microns thick. In contrast, there are instruments within Metrology that can measure down to 0.5 microns.
A micron is one millionth of a metre, and a human red blood cell is 5 microns in diameter. Not every component of a Bentley needs to be measured to tolerances of less than a micron, but there are some.
As an example, Stockdale cites the crankshaft at the heart of Bentley’s 6.0-litre W12 engine, the most advanced 12-cylinder engine in the world which powers the new Flying Spur. Spinning at up to 6,000 rpm, the crankshaft converts the immense downward forces generated by the pistons into rotary movement that powers the wheels. Though invisible to the naked eye, each of the twelve machined bearing journal surfaces in which the crankshaft sits features minute grooves that hold a microscopic film of oil.
By using a high accuracy Perthometer (a tool designed to measure surface finishes) the Metrology team can verify that those minute grooves are within their defined tolerances, in turn ensuring that each W12 engine produces both the immense power and lifelong durability its owners would expect.
A Flying Spur carved from solid aluminium
As well as measuring individual surfaces and components to microscopic levels of accuracy, the Metrology team measures entire vehicles. The department is home to what are termed ‘cubing’ reference vehicles; an entire vehicle body machined out of solid aluminium that acts as a template against which panels and interior components are measured. The cubing Flying Spur is the ideal Flying Spur against which all others are measured, every millimetre of its body scanned using high accuracy digital cameras to create a complete and precise map of the car.
“Imagine an issue at the prototype stage where the panel gap between grille and bonnet is a millimetre too large, “explains Stockdale. “Does the fault lie with the grille, or the bonnet? The cubing reference vehicle provides the answer, because it’s made to the precise dimensions of the CAD data.”
Optical laser scanning
Different materials call for different measuring techniques. The unique three-dimensional diamond quilted leather inserts in the doors and rear quarter panels of the Flying Spur cannot be measured by a tactile device because to touch the surface would distort the reading. Instead, an optical laser scanner is used to chart and check the precise contours of each diamond.
The cabin of the Flying Spur posed a fresh challenge, because of the range of functionality built in for every seat. The rear seats alone offer 14-way adjustment, five massaging modes and the two outer seats are both heated and ventilated. Everything from the seamless fit of the one-piece headlining, wood trim and sumptuous leather upholstery depends upon achieving close tolerances between a variety of different materials, from wood and metal to fabric and leather.
Precise temperature control
Materials expand when warm and shrink when cold, so it’s essential that measurements are taken at a consistent reference temperature. Within the Metrology area, air conditioning keeps the area at a steady 20°C. But for components that demand the highest levels of precision, there’s an inner sanctum called the High Accuracy Measurement area, where a dedicated climate control system ensures that the temperature never deviates by more than half a degree Celsius. Within this area are three gigantic granite blocks to which components can be clamped for the ultimate in stability, essential for an accurate reading. But first, the components to be measured have to soak in the atmosphere – literally. “A large component like an engine block might have to soak at a consistent temperature for up to a week, so we can be sure that it’s 20°C all the way to the core” explains Stockdale.
An unseen contribution
Visitors to Crewe will never visit the Metrology department, nor will the owner of a Flying Spur, Continental GT or Bentayga ever be able to point to the handiwork of its team in their vehicles. Yet the way a Bentley looks, performs and lasts owes everything to the accuracy with which each of its components measures up to the ideal. And for that, the Metrology team are the hidden heroes, custodians of the continuing quest for dimensional perfection. Every Bentley that leaves the factory is a tribute to their unseen contribution.


